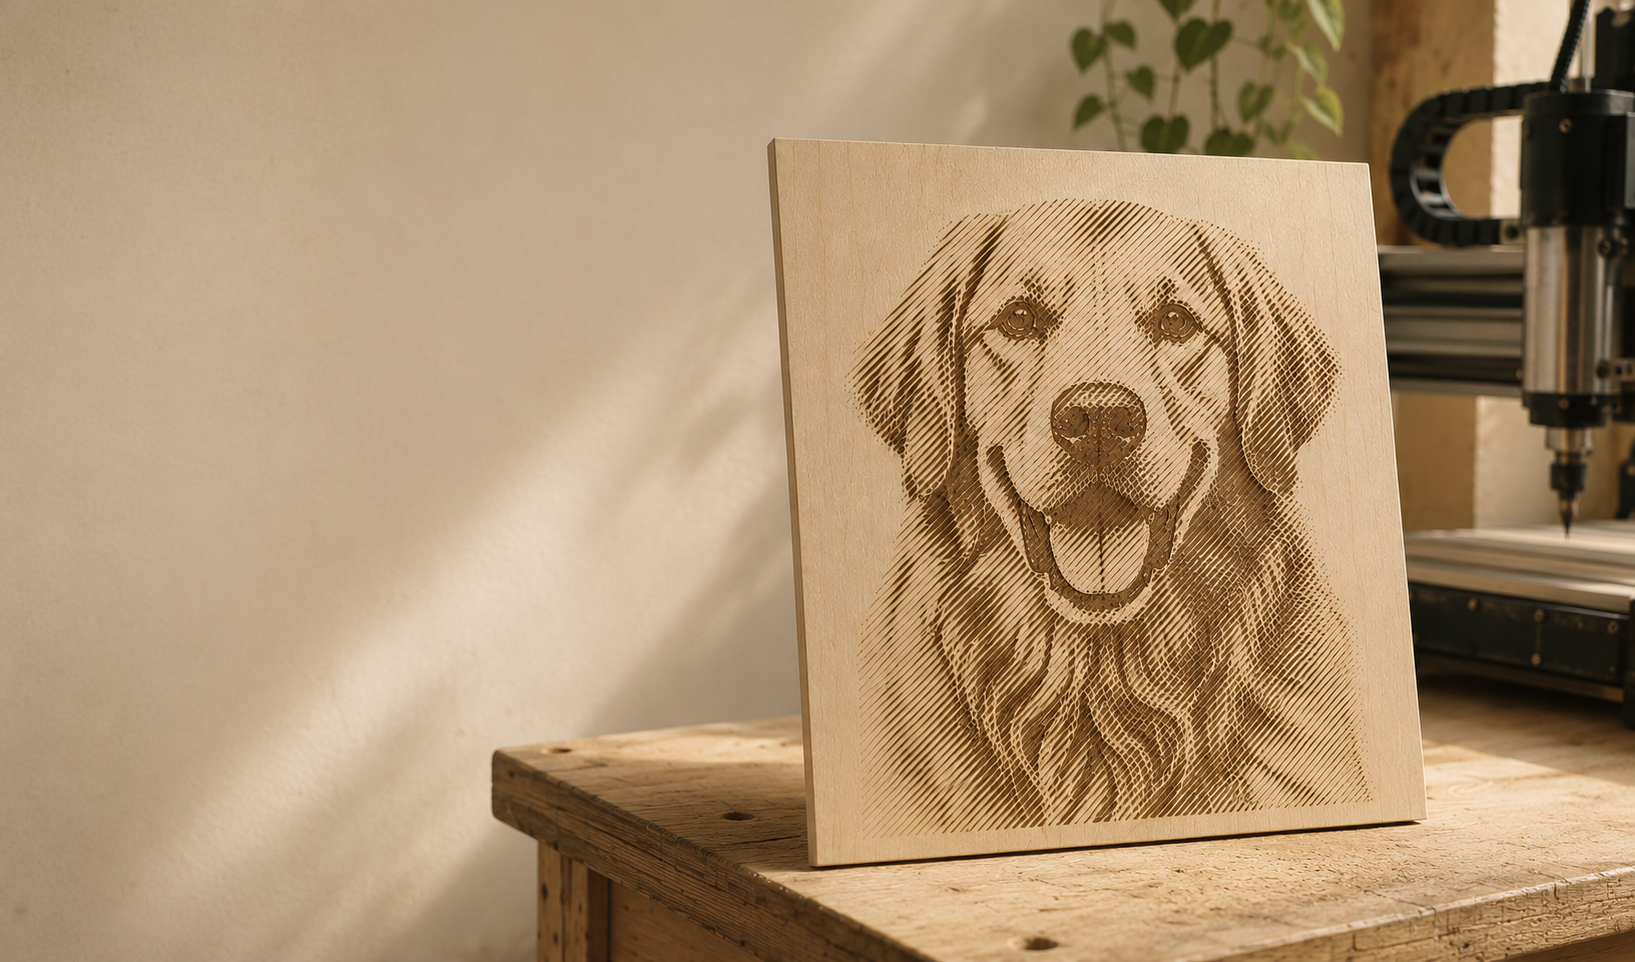
A photo carved into a piece of maple — a portrait, a pet, a wedding date with a face beside it — is one of the most rewarding things a desktop CNC can make, and one of the first projects people want once they’ve cut a few signs. It also has a reputation for being fiddly. It isn’t, once you know which of the two real methods you’re using and how to prepare the image for it. This walkthrough takes you from a photo on your phone to a finished carve, on any GRBL machine — a Genmitsu 3018, a Shapeoko, an Onefinity — and works whether or not you ever open our software.
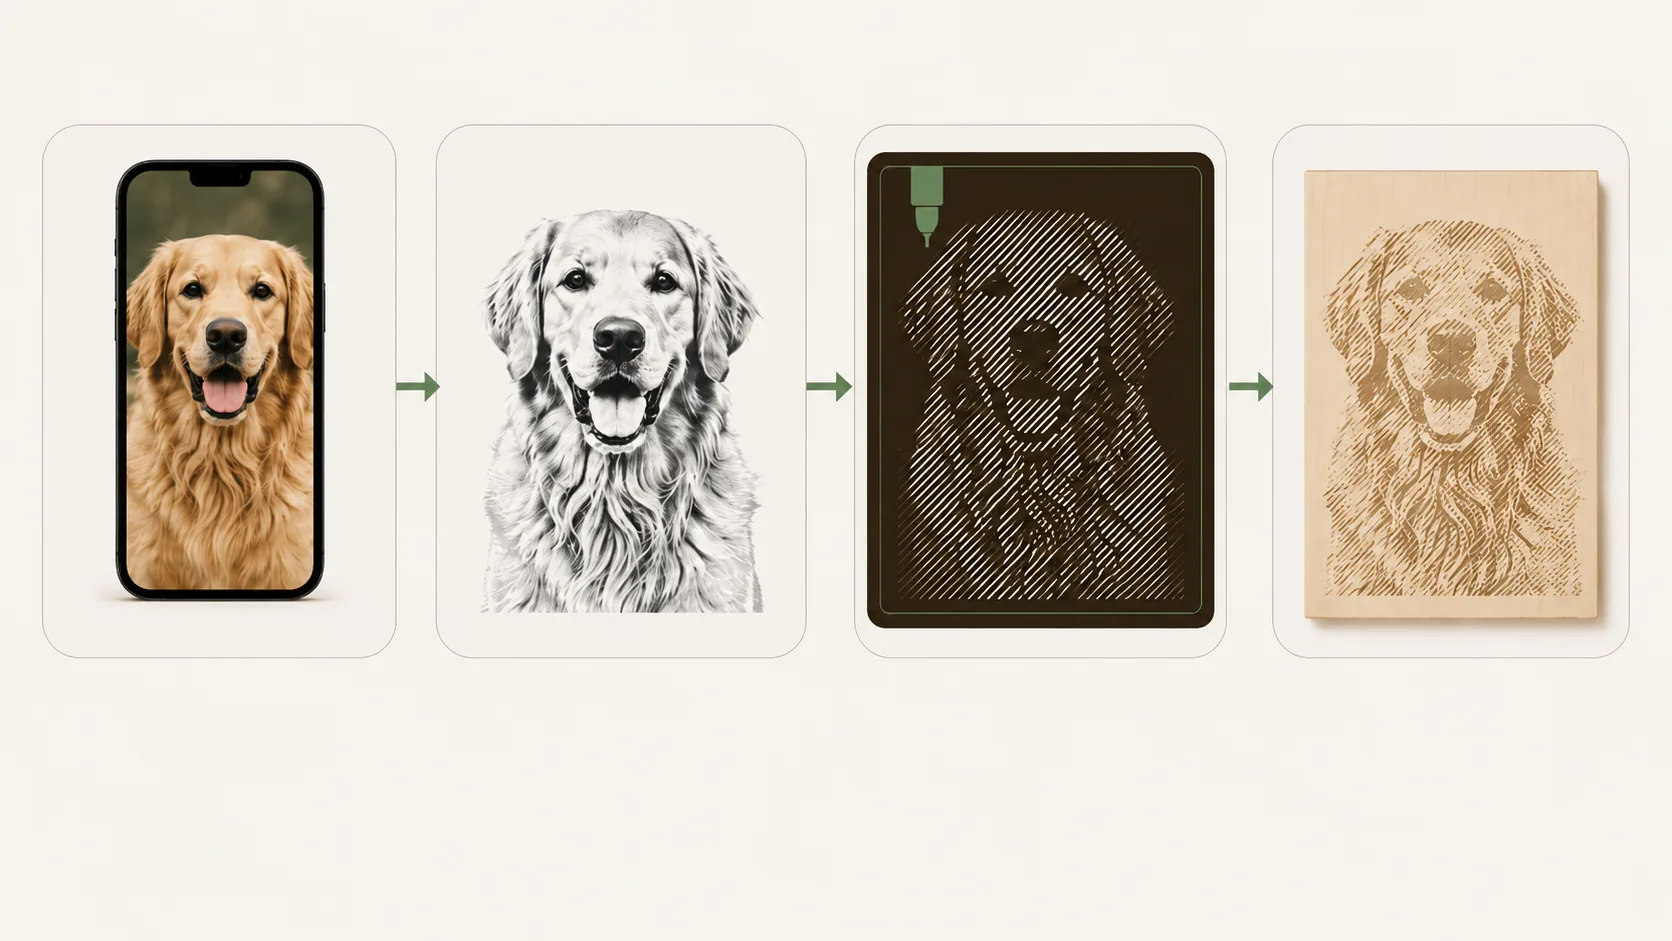
First, pick your method: halftone or photo V-carve
There are two methods that genuinely suit a desktop CNC, and choosing the right one up front saves you most of the trouble people run into. (True 3D relief — sculpting a heightmap with a ball-nose — is a different, much heavier workflow; it isn’t what most people mean by photo carving, and it isn’t what we’re covering here.)
Halftone engraving turns the photo into thousands of discrete marks — dots or short lines — where dark areas get dense, large marks and light areas get sparse, small ones. Every mark is carved at the same shallow depth; the image comes from mark density, not depth. It’s fast, forgiving, reads well from a distance, and looks great on a sign or a gift plaque.
Photo V-carve uses a single V-bit and varies the depth of each line or dot with the brightness of the pixel: darker pixels cut deeper, and because a V-bit gets wider as it goes deeper, deeper marks read as wider and darker. The tone is continuous rather than dotted, so it looks more photographic up close. It’s still a shallow engraving — no 3D surface, no ball-nose, no hours-long raster — just one V-bit doing clever work.
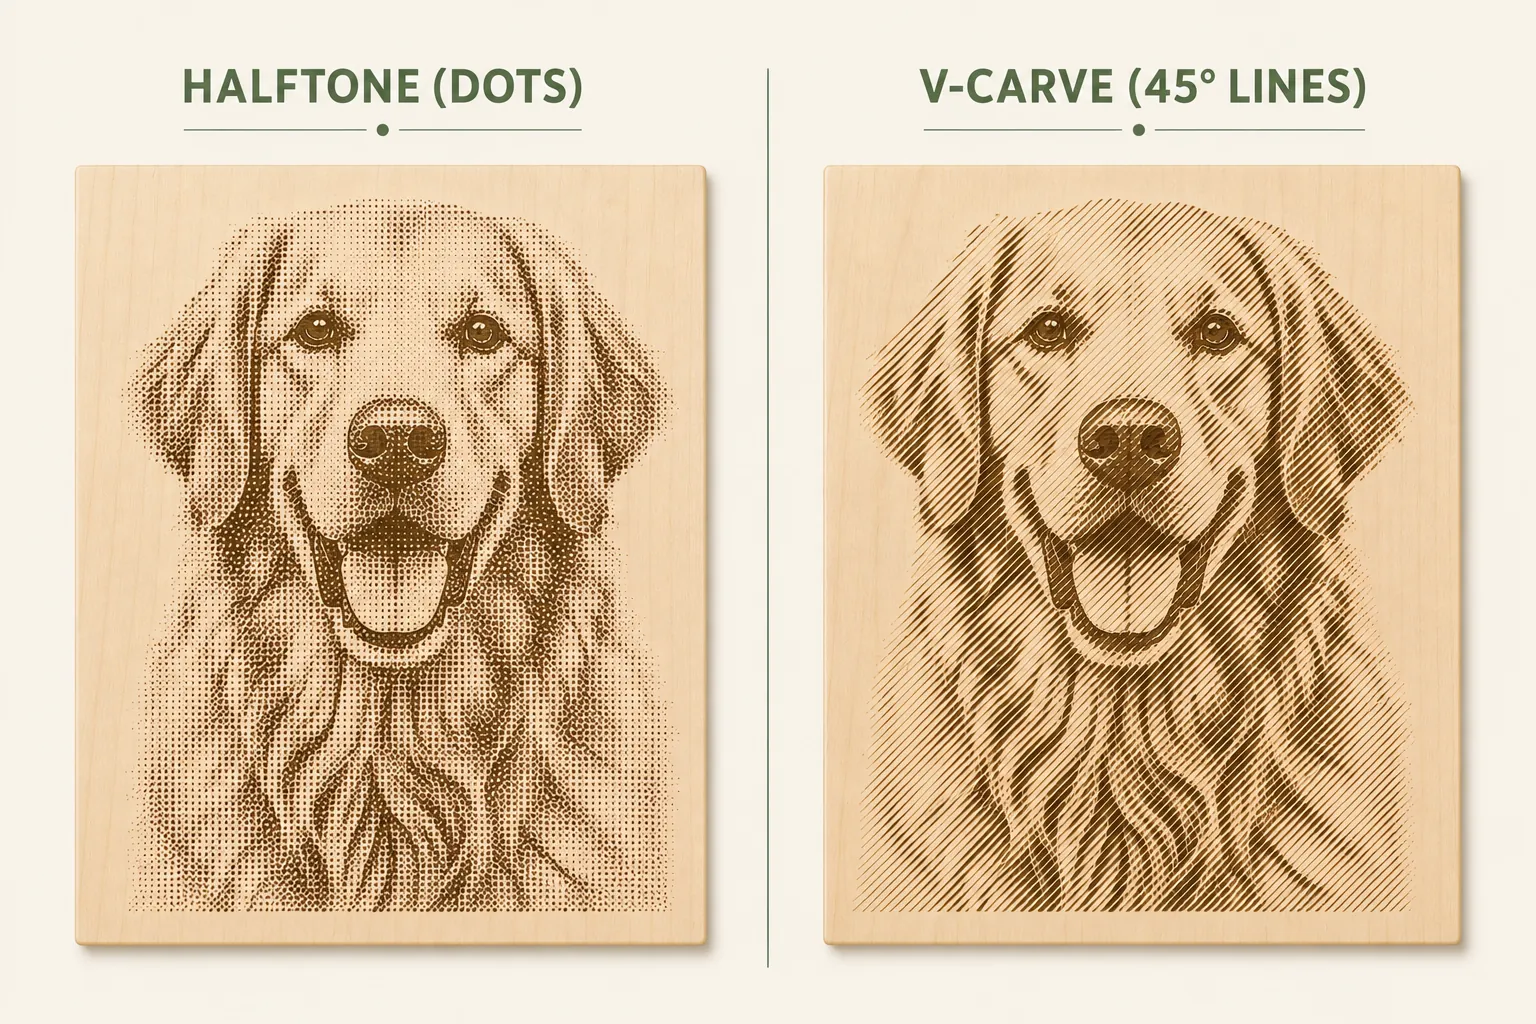
If this is your first photo carve, start with halftone on a sign-sized piece. It’s quicker to cut, easier to recover from, and teaches you the prep habits that photo V-carve depends on anyway.
Prepare the photo (this is where it’s won)
A carve can only be as good as the image you hand it. Spend your time here.
- Choose a high-contrast photo with a clean background. A face lit from one side, against a plain backdrop, carves beautifully. A busy background turns into noise. Crop tight to the subject.
- Convert to grayscale and push contrast. Wood gives you a limited tonal range, so help it: lift the midtones, deepen the shadows, keep the highlights from blowing out completely.
- Match resolution to the carve, not the screen. For photo V-carve, a smooth gradient matters more than megapixels — a slightly blurred image often carves better because it avoids harsh jumps in line width. For halftone, resolution sets dot spacing.
- Mind the contrast and light in the source photo. A face lit from one side has the tonal range these methods feed on; a flat, evenly lit photo carves into a flat, low-contrast result no matter how good your machine is.
Shop note — Do a tiny test carve, 40 × 40 mm, of the most detailed part of the image (usually the eyes) before committing to the full board. Five minutes of test cut tells you more than an hour of staring at the preview.
Choose the wood and the bit
Material choice decides half the result. You want a light, fine-grained, low-figure wood so the carved marks read as shadow against a pale surface and the grain doesn’t fight the image.
| Wood | Photo carving | Why |
|---|---|---|
| Hard maple | Excellent | Pale, tight, even grain — marks read clearly |
| Birch / basswood | Very good | Smooth and cheap; great for practice |
| Cherry | Good | Warm tone, mild figure; ages nicely |
| Walnut | Tricky | Beautiful but dark — low contrast, hides detail |
| Red oak / ash | Avoid for photos | Open, wild grain competes with the image |
For the bit, both methods are friends of the V-bit: a 30°–60° V-bit gives you crisp tapered dots for halftone and clean width-modulated lines for photo V-carve. A fine engraving bit also works for halftone. You don’t need a ball-nose or a 3D toolpath for either — that’s exactly what keeps these methods within reach of a small machine.
Cut it: the workflow
The mechanics are the same six-step discipline as any clean cut — and if you’ve read Why your CNC ruined the board, you already know the checklist. Photo carving just adds a few specifics:
- Surface the stock first. Both methods depend on a flat, consistent reference — a quick facing pass is the difference between even tone and patches that read too light or too dark.
- Zero Z on the actual surface, carefully. With photo V-carve especially, a fraction of a millimetre off changes every line’s width — and therefore every tone.
- Use a gentle feed and the right resolution. Set line or dot spacing fine enough to read as continuous tone, but not so fine the job runs for hours; let the V-bit take clean marks.
- Run the engraving pass once, then stop. Resist re-running “to clean it up”; a second pass rarely registers perfectly and usually adds noise.
- Finish with a wipe of oil or a light sanding sealer. It deepens the contrast and makes the image pop — but test on an offcut first.
; photo V-carve — one V-bit, depth varies with tone
G21              ; mm
G0 Z3.000        ; safe height
G0 X0 Y0
G1 Z-0.45 F200   ; dark pixel  → deeper cut → wider mark
G1 X0.4 F600
G1 Z-0.15        ; lighter pixel → shallower → narrower mark
G1 X0.8
Photo carving is the project HCraft was built to de-risk. It renders the finished portrait on the exact wood you picked — grain, depth, the way the light will fall — and shows the bit, the line spacing and the run time beside it, before you export a single line of G-code. You see whether the eyes will read before you spend two hours and a good piece of maple.
The pitfalls — and how to dodge them
Almost every disappointing photo carve traces back to one of these, and all are preventable:
- The image was too dark or low-contrast. It carves into mud. Fix it in prep, not in the machine.
- The wood was too dark or too figured. Walnut and oak hide the detail you worked for. Save them for signs; use maple for faces.
- The line or dot spacing was too wide. You can see the gaps and the tone looks coarse. Tighten the spacing and accept the longer run time.
- The stock wasn’t flat. One side of the portrait is crisp, the other faint. Surface first.
- No test cut. The single habit that separates a good first carve from a wasted board.
The first portrait I carved was of my dog, in walnut, in the dark. You could barely tell it was a dog. The second was the same photo, prepped properly, in maple — and my partner cried. Same machine, same file. All the difference was in the preparation. — Julien, HCraft
A photo carve isn’t a harder cut than a sign — it’s a more demanding setup, and the demands are all things you can see and control before you start. Pick the method that suits the piece, spend your time prepping the image, choose a pale even-grained wood, and run a test cut. Do that and your first portrait will be one you want to hang up.
See the portrait on the wood. Before you cut it.
HCraft previews your photo carve using the selected material profile, then requires simulation before GRBL export. Free at launch · Windows 11 and macOS 12+ · no trial clock.
Keep reading
- Why your CNC ruined the board (and how to prevent it) — Beginner · 9 min
- Feeds and speeds for wood: a beginner’s table — Beginner · 7 min
Illustrations: original vector artwork by HCraft, released with this article (no third-party rights).