If you keep seeing G-code in CNC videos, forums, and software menus, here’s the simple answer: it is the language that tells your machine where to move, how fast to move, and how deep to cut. You do not need to become a programmer to use it.
What is G-code?
G-code is a set of plain instructions that a CNC machine follows to move its toolpath. Each line describes an action such as moving in a straight line, changing speed, lowering the cutter, or pausing. Think of it as the machine’s operating script: short, precise commands that turn a design into motion.
A useful analogy - G-code as a recipe for your CNC machine
A good way to understand G-code is to picture a recipe. The ingredient list is your design, the cooking steps are the moves, and the oven settings are the feed rate, spindle speed, and depth of cut. The machine does not invent anything on its own. It simply follows the recipe exactly as it was written.
What a G-code file actually contains
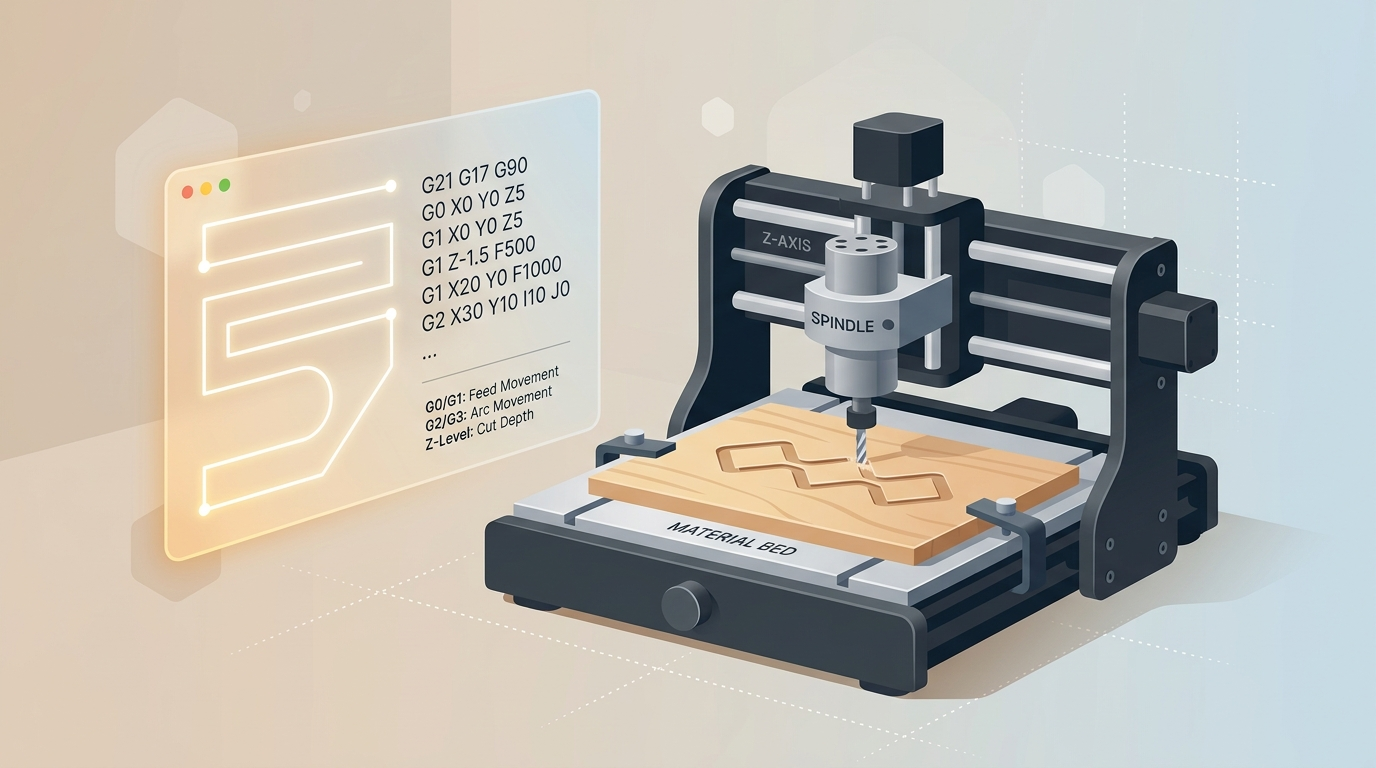
A G-code file usually includes movement commands, speed settings, and depth changes. For example, one line might tell the machine to move to a position, another line might tell it to cut slowly, and another might lift the tool back up. You will often see commands like G0 for fast positioning and G1 for controlled cutting moves.
G21 G17 G90
G0 X0 Y0 Z5
G1 Z-1.5 F500
G1 X20 Y0 F1000
G2 X30 Y10 I10 J0
Don’t worry if that looks cryptic. The important part is the idea, not the syntax. The file is just a list of instructions that a CNC controller can read line by line.
Do you need to write G-code yourself?
Almost never. Most CNC beginners should not write G-code by hand. Instead, design or import your project in software, let the CAM tool generate the file, and use the controller to run it. Manual editing is usually only for advanced troubleshooting or edge cases.
How G-code gets created - the CAM software step
CAM software takes your design and converts it into machine instructions. It decides how the tool should travel, where to lift, how fast to move, and how deep to cut. If you are making photo v-carving or engraving work, the software also has to balance detail, material behavior, and tool shape so the final cut matches the image.
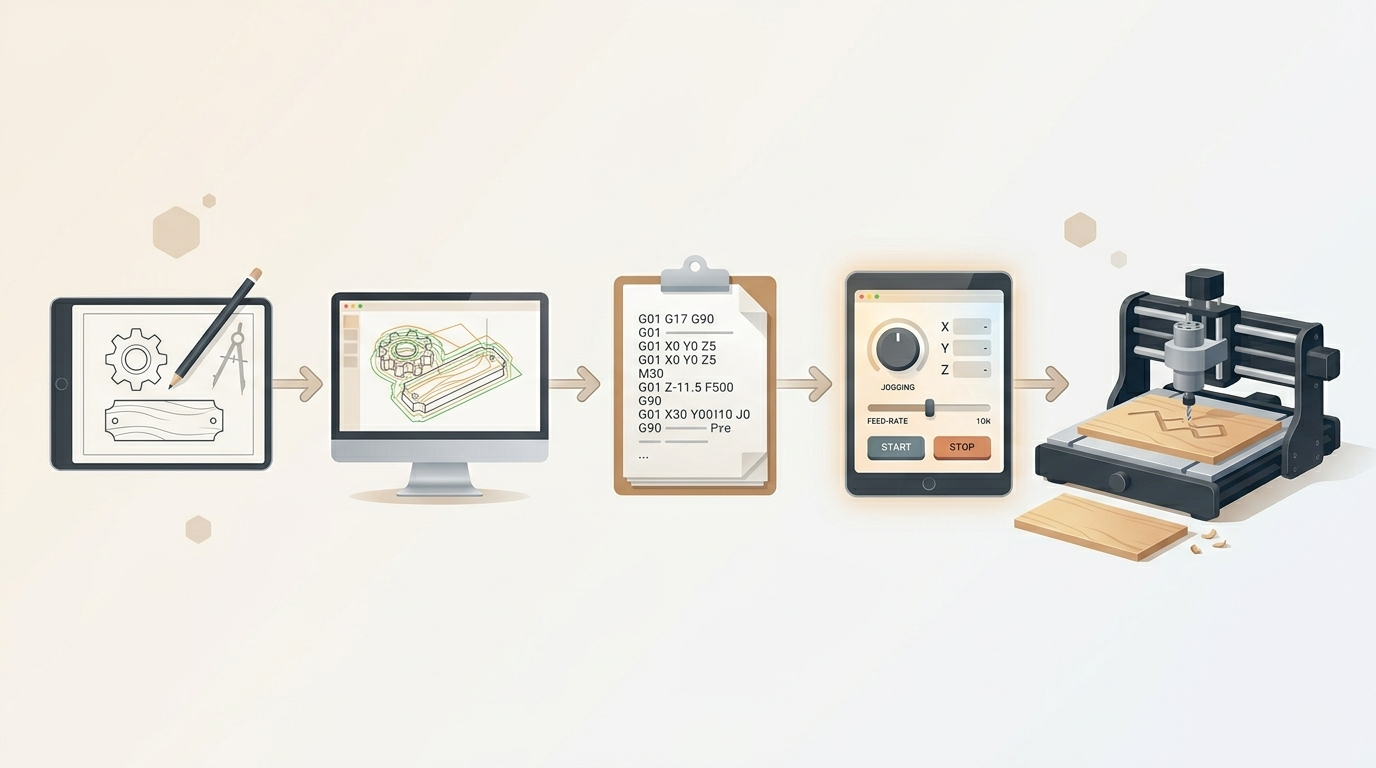
How G-code gets sent to your machine - the control software step
Once the G-code file is created, control software sends it to the CNC machine. This is where the machine starts following the instructions in real time. The control app is the bridge between the file and the hardware, so it is also where you can start, pause, stop, or verify the job.
What can go wrong with G-code and how to catch it before cutting
Problems usually come from the path, not the word “G-code” itself. A wrong depth, a missed zero point, an incorrect feed rate, or a toolpath that looks good in theory but collides with the real machine can all cause trouble. That is why simulation matters. A visual preview helps you spot bad moves before any material is cut.
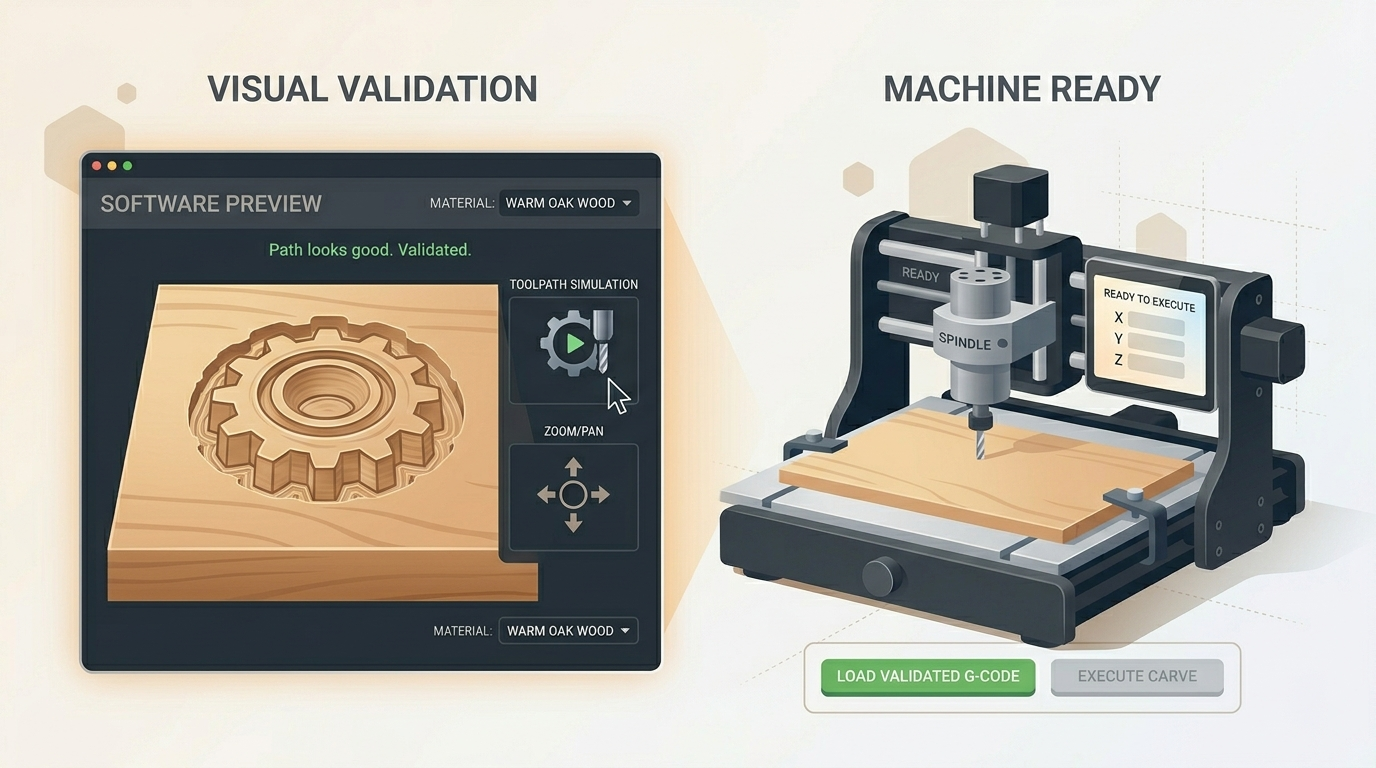
If the preview looks wrong, stop there. Fix the settings before the machine touches the stock. That is the safest and cheapest place to catch mistakes.
How HCraft generates and validates G-code for photo v-carving
HCraft is built to make this process less intimidating. It generates G-code for photo v-carving, checks the path visually, and simulates the job before export. That means you can focus on the result instead of hand-tuning machine code. The path is validated before the machine ever sees it, so you can catch problems early and move forward with more confidence.
In practice
HCraft generates G-code for photo v-carving and simulates it before export — you never touch G-code by hand.